
Jupyer Notebook#
This section includes notes on how to use
Jupyter Notebookas well asjupyter-book.Recommended Readings:
Check notebook extension documentations (Very useful) (See Install Notebook Extensions)
Keyboard Shortcuts#
Cmd + Shift + P: Look up key shortcutsEsc: Get into command modeEnter: Get into edit modeWhile in command mode:
A: insert a new cell aboveB: insert a new cell belowDD: delete the current cell
Shift + Tab: Documentation (Docstring) of the objectCtrl + Shift + -: Split cellsEsc + F: Find and replaceEsc + O: Toggle cell outputsShift + UP/DOWN: select multiple cellsShift + M: Merge multiple cellsY: Change cell to codeM: Change cell to markdownCtrl+/: Uncomment and comment code chunk
Citation#
In-text citation
An example of in-text citation
{cite}`deyne2016`.
Bibliography
To include the bibliography at the end of the file):
{bibliography} book.bib
:filter: docname in docnames
:style: unsrt
Special Blocks in Jupyer Book#
attention,caution,danger,error,hint,important,note,tip,warningadmonition(with self-defined headings)format:
:::{admonition}

:::
Font Awesome Icons#
To include icons in the markdown cell, currently I use the html version.
<i class="fa fa-check fa-1x" style="color:DarkTurquoise;margin-right:5px"></i>
With the CSS, we can control the color and margins of the icon.
It seems that jupyterbook supports Font Awesome v4 better.
Add Images/Figures#
Cross-reference and Citations#
Add labels before the bookmarked positions (e.g., sections):
(LABEL_NAME)=
Cross-reference:
{ref}`LABEL_NAME`
Build the book#
Open the
terminaland traverse to the root of the book directoryBuild the book
$ jupyter-book build .
Push to GitHub
Note
If specific directories need to be removed from the GIT control, create a file .gitignore in the GitHub repository and list all these directories/files to be ignored in the file.
$ git add .
$ git commit -m "XXX"
$ git push origin master
Create GitHub Pages html files as a branch
Caution
This step of creating a branch is needed only for the first time.
$ git-ghp -n -p -f _build/html
Updates the github pages
build the jupyter book
update the repository by pushing all changes
update the github pages via
$ ghp-import -n -p -f _/build/html
Updates of GitHub: Password-based authentication for Git is deprecated, and using a PAT is more secure. Check Creating a personal access token
To remove a directory from GIT but not local:
$ git rm -r --cached XXX
Publish Jupyter-book on Github#
Documentations
Important Steps
Create an empty repo on Github
Open Terminal.
Change the current working directory to your local project.
Initialize the local directory as a Git repository:
$ git init
Add commmits:
$ git add .
To unstage a file, use ‘git reset HEAD YOUR-FILE’.
$ git commit -m "First commit"
Add the Github remote URL to the project local directory and verify it
$ git remote add origin remote repository URL
$ git remote -v
Push changes
$ git push -u origin master
Publish the book as Github Pages#
Install
ghp-import
$ pip install ghp-import
Create a branch of the repo called gh-pages and pushes to GitHub
$ git-ghp -n -p -f _build/html
$ ghp-import -n -p -f _build/html
Note
The -n refers to “not Jekyll”
Change Notebook Themes#
Install
jupyterthemes
$ pip install jupyterthemes
Change themes
To preserve the toolbars (-T), Logo (-N), and kernel logo (-kl)
$ jt -l
$ jt -t monokai (-T -N -kl)
Restart the browser after setting the new theme
List of available theme names
onedork
grade3
oceans16
chesterish
monokai
solarizedl
solarized
Reset to the original default theme:
$ jt -r
Use a specific environment in notebook#
First, create a new environment
! conda create --name ENV_NAME python=3.7
Activate the new envrionment
$ source activate ENV_NAME
install
ipykernal
$ pip install --user ipykernel
Add the environment kernal to Jupyter
$ python -m ipykernel install --user --name=myenv
Check current environment kernels in Jupyter
$ jupyter kernelspec list
Remove an environment from Jupyter kernel list
$ jupyter kernelspec uninstall myenv
Note
Sometimes, the pre-existing conda environment does not work properly. An easy solution is to create the environment again after you set up the jupyter notebook. It is recommended to always create a new virtual environment for a new project.
Update
conda:
!conda update -n base -c defaults conda
Use the following python snippet to check if the notebook is using the exact conda environment:
import sys
sys.executable
Windows Issues
create the conda environment
activate the conda environment
install the
ipykernelin the conda environmentdeactivate the conda environment
install
nb_conda_kernels
$ conda create --name python-notes python=3.7
$ conda activate python-notes
$ conda install ipykernel
$ conda deactivate
$ conda install nb_conda_kernels
$ python -m nb_conda_kernels list
$ jupyter notebook
Now, you should be able to see your conda kernel in Jupyter notebook.
And remember to use Anaconda Powershell Prompt to activate your python-notes conda environment before installing any packages.
Install Notebook Extensions#
There are in general three steps
Install the modudle
jupyter_contribe_nbextensionsInstall javascript and css files
Enable specific extensions
$ pip install jupyter_contrib_nbextensions
$ jupyter contrib nbextension install --user
$ jupyter nbextension enable <nbextension require path>
Use
jupyter_extensions_configuarorto manguage the extensionsRecommended extensions:
varInspector: very useful to check objects in the current memory of the kernel.ScratchPad: very good for debugging in notebookTable on Content (2): Good to view the outline structure of the notebook file.SpellchkerLive Markdown Preview
IPython Magic Commands#
Magic commands from IPython
Useful magic commands:
# list all env variables
%evn
# set env variable
%env OMP_NUM_THREADS=4
Run external python codes/files
%run ./hello-world.py
Insert code from an external script
%load SCRIPT_NAME
Time the process
## Time the single run of the code in the cell
%%time
## Run a statement 100,000 times by default and provide the mean of the fastest three times
%timeit
## Shoe how much time your program spent in each function
%prun STATEMENT_NAME
Write files
%%writefile FILENAME
## save contents of the cell to an external file
%pycat
## show the syntax highlighted contents of an external file
Debugging
%pdbRender high-resolution graphs for Retina screens
%config InlineBackend.figure_format = 'retina'
Run shell commands
!ls *.ipynb
LaTex formula automatic rendering in markdown
\(P(A \mid B) = \frac{P(B \mid A) P(A)}{P(B)}\)
Hide or Remove Content#
Running R and Python in the Same Notebook#
To do this, first we need to install relevant R packages to make the system default R kernel avaiable to the notebook
# in the terminal
$ R
# in R
install.package("IRkernel")
IRkernel::installspec()
Then install the python module
pip install rpy2To use R and Python at the same time, the magic commend
%load_ext rpy2.ipython
%R library(ggplot2)
Mac users may run into issues when installing
rpy2. Please see this solution. General principles:Install Homebrew
Install ggc with
brew install gccInstall rpy2 using the updated gcc
env CC=/usr/local/Cellar/gcc/10.2.0/bin/gcc-10 pip install rpy2
Useful Webinar: A Single Home for Python and R
%run hello-world.ipynb
Hello Word!
%%time
import time
for _ in range(1000):
    time.sleep(0.01)
CPU times: user 13.8 ms, sys: 16.9 ms, total: 30.7 ms
Wall time: 11.5 s
import numpy
%timeit numpy.random.normal(size=100)
9.36 µs ± 87.6 ns per loop (mean ± std. dev. of 7 runs, 100000 loops each)
# List all Magic commands
%lsmagic
Available line magics:
%alias  %alias_magic  %autoawait  %autocall  %automagic  %autosave  %bookmark  %cat  %cd  %clear  %colors  %conda  %config  %connect_info  %cp  %debug  %dhist  %dirs  %doctest_mode  %ed  %edit  %env  %gui  %hist  %history  %killbgscripts  %ldir  %less  %lf  %lk  %ll  %load  %load_ext  %loadpy  %logoff  %logon  %logstart  %logstate  %logstop  %ls  %lsmagic  %lx  %macro  %magic  %man  %matplotlib  %mkdir  %more  %mv  %notebook  %page  %pastebin  %pdb  %pdef  %pdoc  %pfile  %pinfo  %pinfo2  %pip  %popd  %pprint  %precision  %prun  %psearch  %psource  %pushd  %pwd  %pycat  %pylab  %qtconsole  %quickref  %recall  %rehashx  %reload_ext  %rep  %rerun  %reset  %reset_selective  %rm  %rmdir  %run  %save  %sc  %set_env  %store  %sx  %system  %tb  %time  %timeit  %unalias  %unload_ext  %who  %who_ls  %whos  %xdel  %xmode

Available cell magics:
%%!  %%HTML  %%SVG  %%bash  %%capture  %%debug  %%file  %%html  %%javascript  %%js  %%latex  %%markdown  %%perl  %%prun  %%pypy  %%python  %%python2  %%python3  %%ruby  %%script  %%sh  %%svg  %%sx  %%system  %%time  %%timeit  %%writefile

Automagic is ON, % prefix IS NOT needed for line magics.
!ls *.ipynb
data-structure.ipynb       miscellaneous-notes.ipynb
data-visualization-1.ipynb notebook-to-slides.ipynb
data-visualization-2.ipynb numpy.ipynb
google-colab-r.ipynb       pandas.ipynb
google-colab.ipynb         pickle.ipynb
hello-world.ipynb          productive-tech.ipynb
input-output.ipynb         program-structure.ipynb
jupyter-notebook.ipynb     python-tricks.ipynb
magic-r.ipynb              web-applications.ipynb
## Run R code chunks in notebook with python codes
%load_ext rpy2.ipython
%%R
library(dplyr)
library(ggplot2)
data.frame(x = seq(1,100), y = seq(seq(1,100))) %>%
ggplot(aes(x,y)) + geom_point()
R[write to console]:
Attaching package: ‘dplyr’


R[write to console]: The following objects are masked from ‘package:stats’:

    filter, lag


R[write to console]: The following objects are masked from ‘package:base’:

    intersect, setdiff, setequal, union
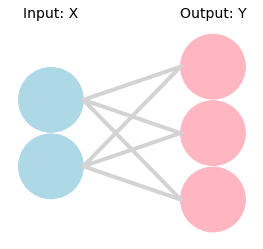
Create Neural Network Diagram#
# import numpy as np
# import matplotlib.pylab as plt
# from draw_neural_net import draw_neural_net
# fig = plt.figure(figsize=(6, 6))
# ax = fig.gca()
# ax.axis('off')
# draw_neural_net(ax, .1, .9, .1, .9, [3, 4, 2])

# fig = plt.figure(figsize=(6, 6))
# ax = fig.gca()
# ax.axis('off')
# draw_neural_net(ax, .1, .7, .1, .9, [2, 3, 2])
## Methods to create neural network diagram

# from draw_neural_net2 import draw_neural_net3
# fig = plt.figure(figsize=(12, 12))
# ax = fig.gca()
# ax.axis('off')
# draw_neural_net3(ax, .1, .9, .1, .9, [2,2],
#                 coefs_=[np.array([[0.4,0.5],[0.1,0.2]])],
#                 intercepts_=[np.array([99,99])],
#                # np=np, plt = plt,
#                 n_iter_ = 1, loss_=0.4)
# %load_ext tikzmagic
# %%tikz -f svg

# \tikzset{every node/.style={font=\sffamily,white}}

# \node[fill=red] at (0,0) (a) {This};
# \node[fill=blue] at (2,0) (b) {That};
# \draw[->] (a) -- (b);
from nnv import NNV

layersList = [
    {"title": "Input: X", "units": 2, "color": "lightBlue"},
    {"title": "Output: Y", "units": 3, "color": "lightpink"},
    #{"title": "Labels", "units": 2, "color": "lightpink"},
]

NNV(layersList, font_size=14).render()
(<Figure size 432x288 with 1 Axes>, <AxesSubplot:>)
Memory Issues#
When seeing error messages as shown below:
IOPub data rate exceeded.
The notebook server will temporarily stop sending output
to the client in order to avoid crashing it.
Try:
jupyter notebook --NotebookApp.iopub_data_rate_limit=1.0e10
pip Command#
pip is a great tool to manage python packages.
pip --version: Check currentpipversionpip install --upgrade XXX: UpdateXXXpip install XX: Install package XXpip install -U XX: Update package XXpip uninstall XX: Uninstall package XXpip install -v XX==1.0: Install package of specific versionpip list: List all packages installedpip install -r requirements.txt: Install several packages all at oncepip freeze > requirements.txt: Save all installed packages into a listpip show XXX: show version information of specific package (XX)
Clear Objects#
A simple function to clear user-defined objects in the current session.
## Define clear env function
def clearKernel():
  for element in dir():
      if element[0:2] != "__" & element != "clearKernel":
          del globals()[element]
Other issues#
If runnning into the follow issue when compiling the jupyter book:
# OMP: Error #15: Initializing libiomp5.dylib, but found libiomp5.dylib already initialized.
There are two solutions suggested on the Stack Overflow:
Method 1 (Not recommended):
import os
os.environ["KMP_DUPLICATE_LIB_OK"]="TRUE"
Method 2 (Recommended!!):
Install the package in the conda environment.
conda install nomkl
Package Importing#
Python can only import self-defined libraries in the current working directory (i.e., the directory where the script file is).
To use libraries in other directories, we need to add the lib path to the system.
import sys
sys.path.insert(1, '../nlp')
import text_normalizer_zh as tn
Requirements#
numpy==1.18.1